Decals.com Transfer Cut Guidelines
Please follow these guidelines when creating your custom transfer-cut stickers or decals. This will help to ensure that we can accommodate your transfer decal project.
Application as Easy as 1, 2, 3!
1.
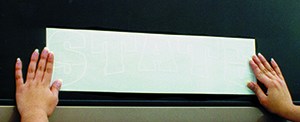
Clean surface thoroughly. Carefully remove paper backing, leaving the vinyl on the transfer tape. Place decals on intended surface.
2.
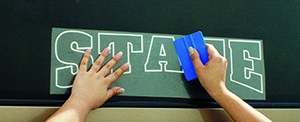
Using a plastic squeegee or credit card, start in the center of design and firmly apply design to surface using overlapping strokes.
3.
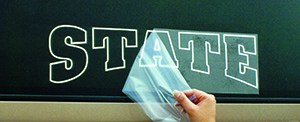
Carefully begin to remove transfer tape to expose product. If bubbles occur, simply prick the bubble with a needle and smooth.
Note: Best results when applied between 60o – 80o F. Do not apply in direct sunlight. Wait a few days for adhesive to fully cure before washing.
If you have any questions, please contact a customer service representative at (320) 391-5250 or email [email protected].